GitHub Apps からトークンを生成して GitHub API を利用する
GitHub API を利用するプログラムを書くときは、パーソナルアクセストークンを利用するのがお手軽なやり方です。
しかし、GitHub Apps を利用すると、
という優れた点を享受できます。GitHub Apps はトークン発行の手順がパーソナルアクセストークンに比べると複雑なので、本記事で紹介したいと思います。
手順は、以下です。 (前提として、GitHub Apps を作成して、Organization に GitHub Appsをインストール設定済み、GitHub Apps の設定から秘密鍵を生成済みとします。)
トークン取得手順
JWTデータの生成
トークンを取得する前に、まず GitHub Apps の認証をします。認証には、GitHub Apps の設定画面から生成した秘密鍵で署名した、JWTデータを利用します。
以下は、GitHub のドキュメントに掲載されているJWTデータを生成するRubyスクリプトの例です(jwt の gem をインストールしておく必要あり)。
jwt.rb
require 'openssl'
require 'jwt'  # https://rubygems.org/gems/jwt

# Private key contents
private_pem = File.read(ARGV[0])
private_key = OpenSSL::PKey::RSA.new(private_pem)

# Generate the JWT
payload = {
  # issued at time, 60 seconds in the past to allow for clock drift
  iat: Time.now.to_i - 60,
  # JWT expiration time (10 minute maximum)
  exp: Time.now.to_i + (10 * 60),
  # GitHub App's identifier
  iss: "ARGV[1]"
}

jwt = JWT.encode(payload, private_key, "RS256")
puts jwt
Installationの選定
上記 Ruby スクリプトを実行することで得られたJWTデータを利用して、Installation のリストを取得します。Installation とは、GitHub Apps をインストールしている主体のことです。例えば、GitHub Apps を公開して、様々な個人ユーザーのアカウントや企業の Organization にインストールされたとすると、このインストールをした一つ一つの主体が Installation となります。トークンは Installation の単位で発行されるので、トークンを生成するときにはどの Installation を対象にトークンを発行するのか決めるために、Installation ID を指定する必要があります。
以下は、Installation のリストを取得するための curl リクエストです。${JWT} のところに、前節で生成したJWTの値を入れます。
$ curl -i -X GET \
-H "Authorization: Bearer ${JWT}" \
-H "Accept: application/vnd.github+json" \
https://api.github.com/app/installations
リクエストが成功すると、以下の応答例のように Installation の一覧を取得できます。応答データから、トークンを発行したい Installation の id を控えます。もし、 GitHub Apps をプライベートに設定していると、GitHub Apps のオーナーのみが GitHub Apps をインストールできる設定となっているので、自作のGitHub Apps をインストールした状態であれば、Installation の数はおそらく1つになります。
https://api.github.com/app/installations の応答例
[
  {
    "id": 1,
    "account": {
      "login": "octocat",
      "id": 1,
      "node_id": "MDQ6VXNlcjE=",
      "avatar_url": "https://github.com/images/error/octocat_happy.gif",
      "gravatar_id": "",
      "url": "https://api.github.com/users/octocat",
      "html_url": "https://github.com/octocat",
      "followers_url": "https://api.github.com/users/octocat/followers",
      "following_url": "https://api.github.com/users/octocat/following{/other_user}",
      "gists_url": "https://api.github.com/users/octocat/gists{/gist_id}",
      "starred_url": "https://api.github.com/users/octocat/starred{/owner}{/repo}",
      "subscriptions_url": "https://api.github.com/users/octocat/subscriptions",
      "organizations_url": "https://api.github.com/users/octocat/orgs",
      "repos_url": "https://api.github.com/users/octocat/repos",
      "events_url": "https://api.github.com/users/octocat/events{/privacy}",
      "received_events_url": "https://api.github.com/users/octocat/received_events",
      "type": "User",
      "site_admin": false
    },
    "access_tokens_url": "https://api.github.com/installations/1/access_tokens",
    "repositories_url": "https://api.github.com/installation/repositories",
    "html_url": "https://github.com/organizations/github/settings/installations/1",
    "app_id": 1,
    "target_id": 1,
    "target_type": "Organization",
    "permissions": {
      "checks": "write",
      "metadata": "read",
      "contents": "read"
    },
    "events": [
      "push",
      "pull_request"
    ],
    "single_file_name": "config.yaml",
    "has_multiple_single_files": true,
    "single_file_paths": [
      "config.yml",
      ".github/issue_TEMPLATE.md"
    ],
    "repository_selection": "selected",
    "created_at": "2017-07-08T16:18:44-04:00",
    "updated_at": "2017-07-08T16:18:44-04:00",
    "app_slug": "github-actions",
    "suspended_at": null,
    "suspended_by": null
  }
]
トークンの生成
JWTを生成して、トークン発行対象のInstallation ID も決まったら、以下のように、トークンの生成リクエストを GitHub API に送ります。
${YOUR_JWT} には、生成したJWTの値、${installation_id}には、前段で控えた Installation の id を設定します。
curl -i -X POST \
-H "Authorization: Bearer ${YOUR_JWT}" \
-H "Accept: application/vnd.github+json" \
https://api.github.com/app/installations/${installation_id}/access_tokens
GitHub API へのリクエストに成功すると、応答のjsonデータからトークン値を取得できます。
{
  "token": "ghs_xxxxxxxxxxxxxxxxxxxxxxxxxxxxxxxxxxxx",
  "expires_at": "2022-10-02T13:39:20Z",
  "permissions": {
    "metadata": "read"
  },
  "repository_selection": "selected"
}
GitHub API と通信
取得したトークン値を利用して、GitHub Apps をインストールした時に許可したパーミッションの範囲内で GitHub リソースの読み込みや変更を行うことができます。
例えば、GitHub Apps で Contents の Read-only パーミッションをインストール時に許可されれば、

以下のコマンドでトークンを利用して git clone を実行できます。
git clone https://x-access-token:${TOKEN}@github.com/owner/repo.git
また、以下のコマンドを使えば、対象レポジトリのコミットの一覧を取得できます。
curl \
  -H "Accept: application/vnd.github+json" \
  -H "Authorization: Bearer ${TOKEN}" \
  https://api.github.com/repos/owner/repo/commits
APIのリファレンスを参照しながら実装すれば、様々な GitHub のリソース情報を取得・変更可能です。
手順をコマンドにまとめたもの
ここまでの手順をコマンドにまとめたものが以下です。プライベートの GitHub Apps を作成した前提で、Installation リストの一番最初を Installation ID として設定しています。 トークンを取得すれば、あとは許可された範囲内で GitHub リソースの操作が可能です。
GITHUB_APP_ID=123456
GITHUB_APP_PRIVATE_KEY_PATH="xxxxxx"

# JWT の生成
cat << EOF > jwt.rb
require 'openssl'
require 'jwt'  # https://rubygems.org/gems/jwt

private_pem = File.read(ARGV[0])
private_key = OpenSSL::PKey::RSA.new(private_pem)

payload = {
  # issued at time, 60 seconds in the past to allow for clock drift
  iat: Time.now.to_i - 60,
  # JWT expiration time (10 minute maximum)
  exp: Time.now.to_i + (10 * 60),
  # GitHub App's identifier
  iss: "#{ARGV[1]}"
}

jwt = JWT.encode(payload, private_key, "RS256")
puts jwt
EOF

JWT=$(ruby jwt.rb ${GITHUB_APP_PRIVATE_KEY_PATH} ${GITHUB_APP_ID})

# Installation ID の取得
INSTALLATION_ID=$(curl -s -X GET \
-H "Authorization: Bearer ${JWT}" \
-H "Accept: application/vnd.github+json" \
https://api.github.com/app/installations | jq '.[0].id')

# Token の取得
TOKEN=$(curl -s -X POST \
-H "Authorization: Bearer ${JWT}" \
-H "Accept: application/vnd.github+json" \
https://api.github.com/app/installations/${INSTALLATION_ID}/access_tokens | jq -r .token)
参考
https://docs.github.com/en/developers/apps/building-github-apps/authenticating-with-github-apps
ITS旅行パックを利用して最大10000円割引で旅行に行く

寿司を安く食べることが出来ることで有名な関東ITソフトウェア健康組合ですが、上手く利用すれば旅行も大体好きなところに安く行くことが出来ます。
年度内2回まで、1人1回につき半額(最大10,000円まで)の補助を受けることが出来ます。
申請手順
ツアーを探す
国内旅行の場合は、
のオンラインパンフレットから行きたいツアーを選べます。
今回は、新幹線で旅行したかったので、新幹線を安く利用できることで定評のある日本旅行の赤い風船のパンフレットからツアーを選びました。じゃらんや楽天トラベルなど、ネット予約旅行会社を選ぶことは出来ませんが、JTBや赤い風船などは結構使えるのではないかと思います。
WEBで申し込む
オンラインパンフレットから利用したいツアーを決めたら、WEBフォームから記入して申し込みます。どうやら、WEBフォームに入力された情報を元に、ツアーの手配をしてくれるようです。出発日の10営業日前までに申し込まないといけないので、旅行まで日のないときにはITS旅行パックの利用は難しいので余裕を持って予約しましょう。
電話を受ける
営業日16時までに到着した申し込みについては、受付当日中に回答をもらえるようです。自分の場合は、祝日に申し込みをして、祝日明けの最初の営業日に電話で連絡が来ました。電話で旅行内容について確認が行われるので、内容に間違いがなければそのまま申し込みます。
補助申請をする
その後は、ITS旅行パックの補助申請を行います。じゃらんや楽天などのネット予約会社に慣れていると、少し手順が煩雑に感じますが、ちゃんと定められた手順を進めないと旅行補助を受けることが出来ません。補助申請の締め切りが短いので早く申し込むようにしましょう。
旅行代金を支払う
補助申請がちゃんと受理されると、家の方に旅行代金の請求書が届くので内容に問題ないことを確認したら金額を銀行振り込みで振り込みます。クレジットカード払いなどは無いようです。自分の場合、振り込み期限が請求書の届いた日の翌日(!)だったので、振り込みの期限はシビアです。平日に届いて週末まで中身を確認しないままとしていると、振り込み期限に間に合わないかもしれないので注意です。
旅行書類を受け取る
正しく金額を振り込んだことが確認されると、出発日前までに家の方にホテルや電車のチケットが到着します。これで、旅行に行くことが出来ます。
以下のITS旅行センターのサイトには、ここまで述べた手順がもっとしっかりと詳細に記載されています。
少し手順は煩雑だし、早めに旅行計画を立てる必要はありますが、最大50%分の旅費を補助してもらえるので、関東ITソフトウェア健康組合に加入されている方は検討されても良いのではないでしょうか。パンフレットには、1人旅から家族旅行まで様々なタイプの旅行パックが掲載されています。京都に旅行に行くときにまた利用したいと思います。
unshareコマンドを利用して起動したプログラムのネットワーク通信を防ぐ
unshareコマンドは、PIDやmount, networkなどのnamespaceを作成できます。unshareコマンドでnetworkのnamespaceを新規に作成してプログラムを実行することで、起動したプロセスにおいては、ネットワークデバイス、ルーティングテーブルといったネットワーク関連のリソースは親プロセスから分離されます。
例えば、bashからpingコマンドを実行するとき、unshareコマンドでネットワークのnamespaceを作成して実行すると、新規に作成されたnetworkのnamespaceにおいて、ネットワークデバイスやルーティングテーブルの設定がされていないとpingコマンドは失敗します。
# コンテナを動かしてbashを起動
docker run --rm -it --privileged ubuntu bash

# ping コマンドを取得
apt update
apt-get install -y iputils-ping

# ping の応答が返る
ping google.co.jp
----------------------------------
PING google.co.jp (172.217.175.3) 56(84) bytes of data.
64 bytes from nrt20s18-in-f3.1e100.net (172.217.175.3): icmp_seq=1 ttl=37 time=16.8 ms
64 bytes from nrt20s18-in-f3.1e100.net (172.217.175.3): icmp_seq=2 ttl=37 time=23.7 ms
64 bytes from nrt20s18-in-f3.1e100.net (172.217.175.3): icmp_seq=3 ttl=37 time=26.9 ms
----------------------------------

# ping の応答が返ってこない
unshare -n ping google.co.jp
----------------------------------
ping: google.co.jp: Temporary failure in name resolution
----------------------------------
外部と通信させたくないプロセスを起動するときなどに、このunshareコマンドを利用できます。
apt-get update と yum update の違い
(自分への📝メモも兼ねて)
apt-get update と、yum update は似たような書き方なのでどちらも同じような挙動をするように認識しがちですが、異なります。これら2つのコマンドの解釈を間違えると、思わぬ事故に繋がります。
apt-get update
apt-get updateの説明は以下となります。(Linux ディストリビューションによって多少説明内容は異なるかもしれません。)
update
update is used to resynchronize the package index files from their sources.
The indexes of available packages are fetched from the location(s) specified in /etc/apt/sources.list.
For example, when using a Debian archive, this command retrieves and scans the Packages.gz files, so that information about new and updated packages is available.
An update should always be performed before an upgrade or dist-upgrade.
Please be aware that the overall progress meter will be incorrect as the size of the package files cannot be known in advance.
apt-get update は、パッケージを新規インストールしたり、既存パッケージの更新を実行したりはしません。/etc/apt/sources.list に記載されている場所から入手可能なパッケージのインデックス情報を取得してインデックスファイルを再同期させます。
例えば、debian の docker イメージでapt-get updateを実行する前に、apt-get install apache2を実行するとパッケージを見つけることが出来ません。
$ docker run -it --rm debian bash

# apt-get install apache2
Reading package lists... Done
Building dependency tree... Done
Reading state information... Done
E: Unable to locate package apache2
apt-get updateを実行すると、入手可能なパッケージのインデックス情報を取得してきて、apache2のパッケージをインストール出来るようになります。
# apt-get update
Get:1 http://deb.debian.org/debian bullseye InRelease [116 kB]
Get:2 http://deb.debian.org/debian-security bullseye-security InRelease [48.4 kB]
Get:3 http://deb.debian.org/debian bullseye-updates InRelease [44.1 kB]
Get:4 http://deb.debian.org/debian bullseye/main arm64 Packages [8071 kB]
Get:5 http://deb.debian.org/debian-security bullseye-security/main arm64 Packages [181 kB]
Get:6 http://deb.debian.org/debian bullseye-updates/main arm64 Packages [2604 B]
Fetched 8463 kB in 4s (2107 kB/s)
Reading package lists... Done

# apt-get install apache2
Reading package lists... Done
Building dependency tree... Done
Reading state information... Done
The following additional packages will be installed:
  apache2-bin apache2-data apache2-utils bzip2 ca-certificates file libapr1 libaprutil1 libaprutil1-dbd-sqlite3 libaprutil1-ldap
  libbrotli1 libcurl4 libexpat1 libgdbm-compat4 libgdbm6 libgpm2 libicu67 libjansson4 libldap-2.4-2 libldap-common liblua5.3-0
  libmagic-mgc libmagic1 libncurses6 libncursesw6 libnghttp2-14 libperl5.32 libprocps8 libpsl5 librtmp1 libsasl2-2
  libsasl2-modules libsasl2-modules-db libsqlite3-0 libssh2-1 libxml2 mailcap media-types mime-support netbase openssl perl
  perl-modules-5.32 procps psmisc publicsuffix ssl-cert xz-utils

以下略
debian系でパッケージのインストールに失敗するときは、apt-get updateを実行し忘れていないか確認しましょう。
yum update
yum updateの説明は以下となります。(これも、Linux ディストリビューションによって説明は多少異なると思います。)
update
If run without any packages, update will update every currently installed package.
If one or more packages or package globs are specified, Yum will only update the listed packages.
While updating packages, yum will ensure that all dependencies are satisfied. (See Specifying package names for more information)
If the packages or globs specified match to packages which are not currently installed then update will not install them.
update operates on groups, files, provides and filelists just like the "install" command.
yum update を実行すると、現在インストールされている全てのパッケージについてアップデートを行います。yum update httpdのように、インストールされているパッケージを指定すればそのパッケージを更新しますが、もし指定したパッケージがインストールされていない場合は、新規インストールは実行されません。
amazon linux の docker イメージで試すと以下のようになります。yum update で、gnupg2, tzdata のパッケージが更新されようとします。
また、yum update httpd を実行しても、httpdパッケージがインストールされていないので、更新や新規インストールは実行されません。
$ docker run -it --rm amazonlinux bash

# yum update
Loaded plugins: ovl, priorities
amzn2-core                                                                                                            | 3.7 kB  00:00:00
(1/3): amzn2-core/2/aarch64/group_gz                                                                                  | 2.5 kB  00:00:00
(2/3): amzn2-core/2/aarch64/updateinfo                                                                                | 498 kB  00:00:00
(3/3): amzn2-core/2/aarch64/primary_db                                                                                |  48 MB  00:00:14
Resolving Dependencies
--> Running transaction check
---> Package gnupg2.aarch64 0:2.0.22-5.amzn2.0.4 will be updated
---> Package gnupg2.aarch64 0:2.0.22-5.amzn2.0.5 will be an update
---> Package tzdata.noarch 0:2022a-1.amzn2 will be updated
---> Package tzdata.noarch 0:2022c-1.amzn2 will be an update
--> Finished Dependency Resolution

Dependencies Resolved

=============================================================================================================================================
 Package                      Arch                          Version                                   Repository                        Size
=============================================================================================================================================
Updating:
 gnupg2                       aarch64                       2.0.22-5.amzn2.0.5                        amzn2-core                       1.5 M
 tzdata                       noarch                        2022c-1.amzn2                             amzn2-core                       481 k

Transaction Summary
=============================================================================================================================================
Upgrade  2 Packages

Total download size: 2.0 M
Is this ok [y/d/N]:

以下略

# yum update httpd
Loaded plugins: ovl, priorities
Package(s) httpd available, but not installed.
No packages marked for update
===========================
apt-get update と yum update は違いを意識して使おう
apt-get update と yum update の違いを知らないと、debian 系と centos 系の OS を混同して運用しているときに操作を間違えてしまうことがあります。
例えば、yum update を apt-get update と同じと勘違いして、centos にインストールされている全てのパッケージを意図せずに更新してしまったり、yum -y update ${package} と変数に更新するパッケージ名を指定しているつもりが、指定されていなくて全てのパッケージを更新してしまったりなど、障害を引き落とす落とし穴にはまりやすいので気をつけましょう。
参考
セキュリティツールのテストに使える脆弱性のあるアプリ
仕事でスキャナなどのセキュリティツールのテストをしたいとき、診断対象のアプリを自分で0から用意するのは工数もかかって大変です。会社のアプリをテストに利用するのは、少し不安ですし、バランス良く(?)アプリに脆弱性が含まれていないとセキュリティツールの評価をやりにくくなります。
そんな状況を解決するために世の中には、セキュリティツールのテストやエンジニアの教育向けの脆弱性の含まれたサンプルアプリが提供されています。
| アプリ名 | 言語 | 場所 |
|---|---|---|
| OWASP Juice Shop | Node.js, express | https://github.com/bkimminich/juice-shop |
| RailsGoat | Ruby, Rails | https://github.com/OWASP/railsgoat |
| GoVWA | Go | https://github.com/0c34/govwa |
| Vulnerable Flask Application | Python, Flask | https://github.com/we45/Vulnerable-Flask-App |
| WebGoat | Java, Spring | https://github.com/WebGoat/WebGoat |
brakeman
例えば、Ruby on Rails の静的解析ツールである brakeman の動作テストをしたいのであれば、RailsGoatを使って動作確認ができます。
下記の例では、脆弱性の疑いがあるものを19個見つけています。
~/railsgoat: brakeman -f json . 2>/dev/null | head
{
  "scan_info": {
    "app_path": "/xxxxxxx/railsgoat",
    "rails_version": "6.0.0",
    "security_warnings": 19,
    "start_time": "2022-09-06 22:16:37 +0900",
    "end_time": "2022-09-06 22:16:37 +0900",
    "duration": 0.24359,
    "checks_performed": [
      "BasicAuth",
gitleaks
git レポジトリ内にある秘匿情報を調査する gitleaks などのツールの動作確認もできます。
下記の例では、juice-shop アプリに対してgitleaksを実行して秘匿情報の疑いのあるものを111個見つけています。
~/juice-shop: gitleaks detect -f json .

    ○
    │╲
    │ ○
    ○ ░
    ░    gitleaks

10:03PM INF scan completed in 4.81s
10:03PM WRN leaks found: 111
wkhtmltopdfのCVE-2022-35583
wkhtmltopdfでCVE-2022-35583が報告されていました。
こちらのブログによると、どうやらpdfに変換するhtmlに、iframe, img, script など外部からコンテンツを取得するタグが含まれていると、コンテンツ取得後の画面がpdf化されてしまい情報漏洩につながる場合があるというものでした。
確かに、ローカル環境でhttpdコンテナを動かして、
docker run --rm -dit --name my-running-app -p 8080:80 httpd
htmlファイルをpdf化すると、iframeの中身が表示されていました。
cat test.html
<html>
<head>
</head>
<body>
<iframe src="http://localhost:8080/" width="1000" height="2000">
</body>
</html>

wkhtmltopdf test.html out.pdf

wkhtmltopdfの利用者は、画像などの外部コンテンツが表示された状態のhtmlページをpdf化したいはずなので、この挙動が脆弱性なのかどうかというと意見の分かれるところではないかと思います。
しかし、CVE番号がラベリングされており、このような情報漏洩の可能性を検討しないまま wkhtmltopdf をWEBアプリのpdf出力機能の実装に採用しているところもあるのではないかと思います。
wkhtmltopdfを利用してpdfを作成している処理において、ユーザーからの任意の入力値がhtmlコードに含まれる実装となっていないか確認する必要はありそうです。
三浦半島の海岸と山を走る
車を運転出来るようになったので三浦半島へ小旅行に行って来ました。
toripiyo.hatenablog.com
やっぱり、電車よりも車の方が三浦半島のようなところでは圧倒的に自由に工程を組むことが出来る。バスや電車でのアクセス方法や発車時間を気にせずに、気ままに移動できます。海岸線沿いを移動しながら、油壺温泉・小網代の森・記念艦三笠などに行って来ました。
前々から三浦半島でランニングしてみたかったのですが、横須賀温泉 湯楽の里というところで、脱衣所ロッカーで着替えてランニングに行って、帰ってきたらそのまま温泉に入れるランナーズスパという仕組みを用意していたので、これを利用してランニングしてきました。車だとランニングの荷物が増えても気にしなくて良いので楽ですね。
Runtripで紹介されていたこちらのランニングコースを走りました。
ちょうど真夏の快晴の天気で暑かったですが、途中にファミマや自販機が所々あるので水分は割と簡単に摂れます。海岸で遊ぶ人たちや横須賀基地の軍艦を撮影している人たちの横を通り過ぎながら、湯楽の里から海沿いに走っていくと、観音崎公園まで辿り着きます。

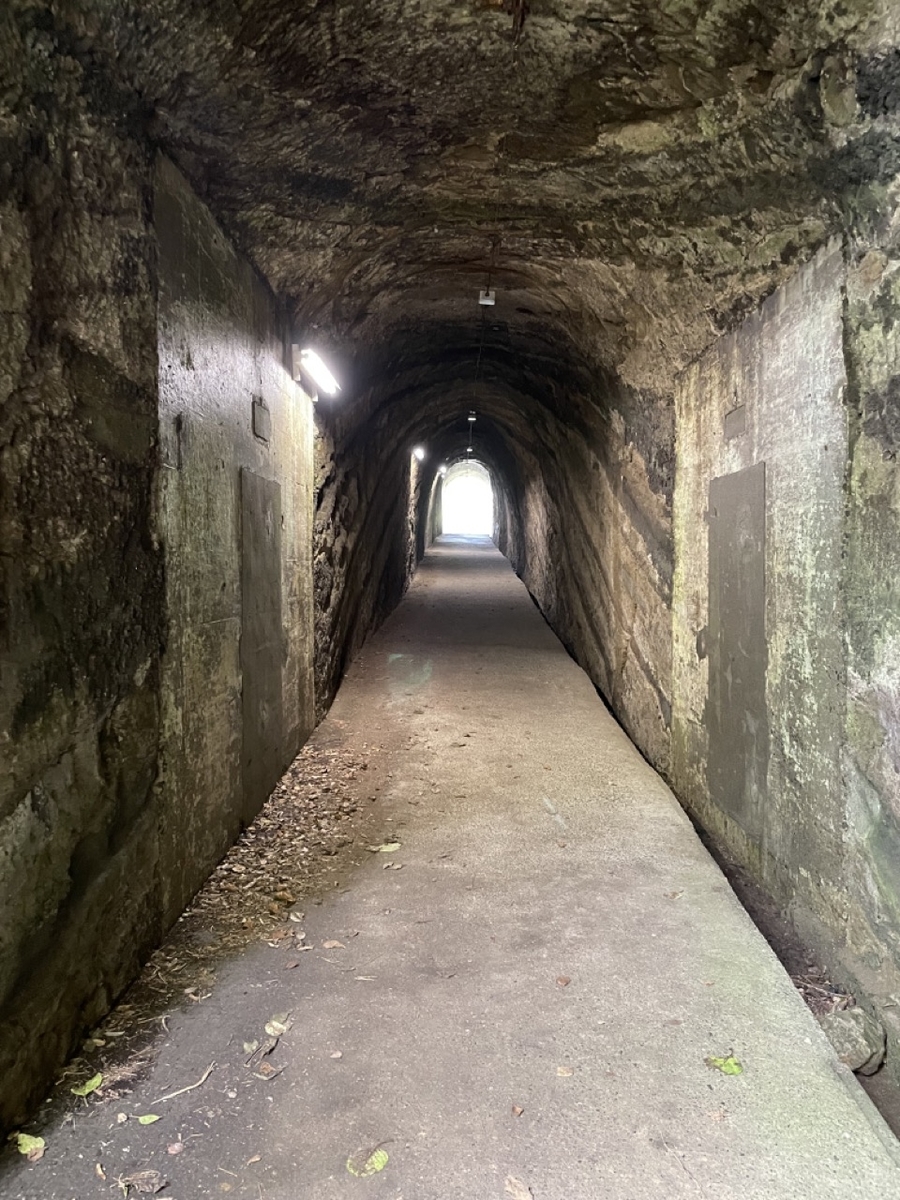
普通の公園かなと思っていたら、山道が多くて自然公園といった感じでした。
トンネルを通り抜けたり、
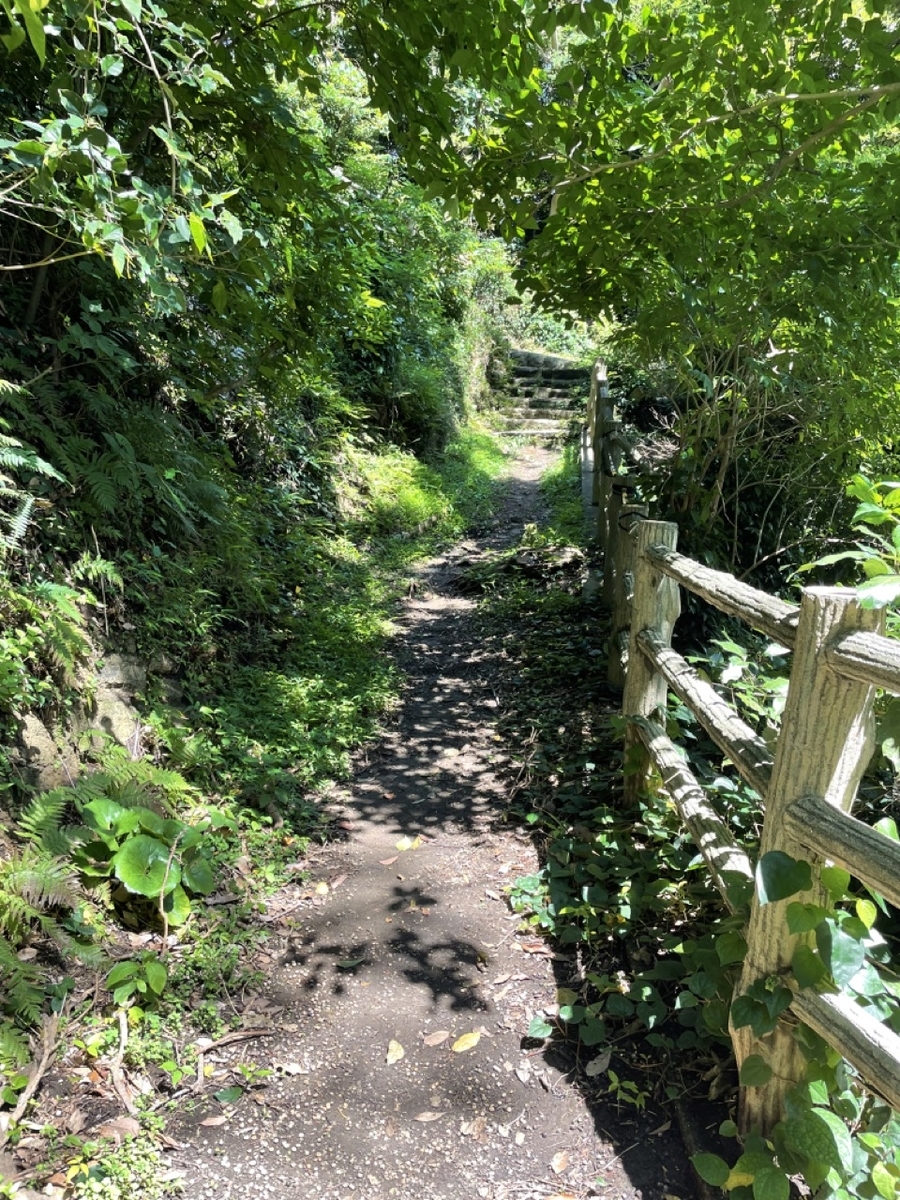
山道を登ったり、
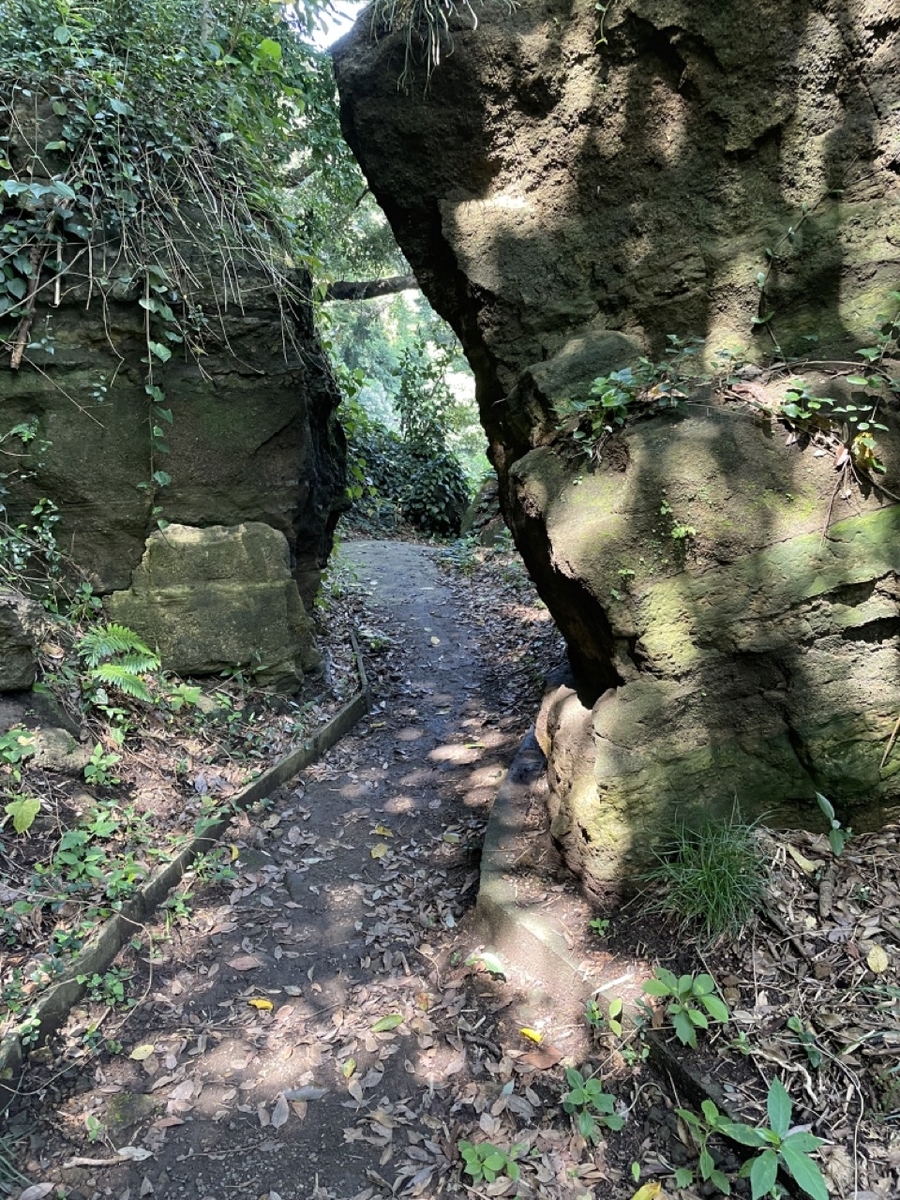
石の切り出し道を通って、
広場のようなところに出て公園を一周します。

観音崎公園から湯楽の里まで戻って、大体10〜11キロほどでした。
温泉に入って、お昼ごはんを食べて帰宅。

湯楽の里から1キロ弱で直ぐに高速に乗れるのでアクセスもしやすい場所だと思います。